
Basic Guide to 3D Reinforcement Detailing Using AddoBAR
Getting started with 3D detailing in AddoBAR? This quick guide will help you lay the foundation for efficient and accurate modeling. Whether you're reinforcing complex structures or drafting standard details, knowing the right setup is key to success.
Very important: Make sure to enable Dynamic UCS in your CAD environment. This feature allows your drawing tools to automatically align with different surfaces and planes in 3D space, significantly improving placement precision and workflow efficiency.
Step 1: Prepare Your 3D Model
Make sure your 3D model is created as a solid and not just a surface or mesh. AddoBAR relies on solid geometry for accurate detailing. Additionally, ensure that Dynamic UCS is enabled—this allows your drawing tools to intelligently align with the faces of your solid model, making placement of reinforcement elements more intuitive and accurate.
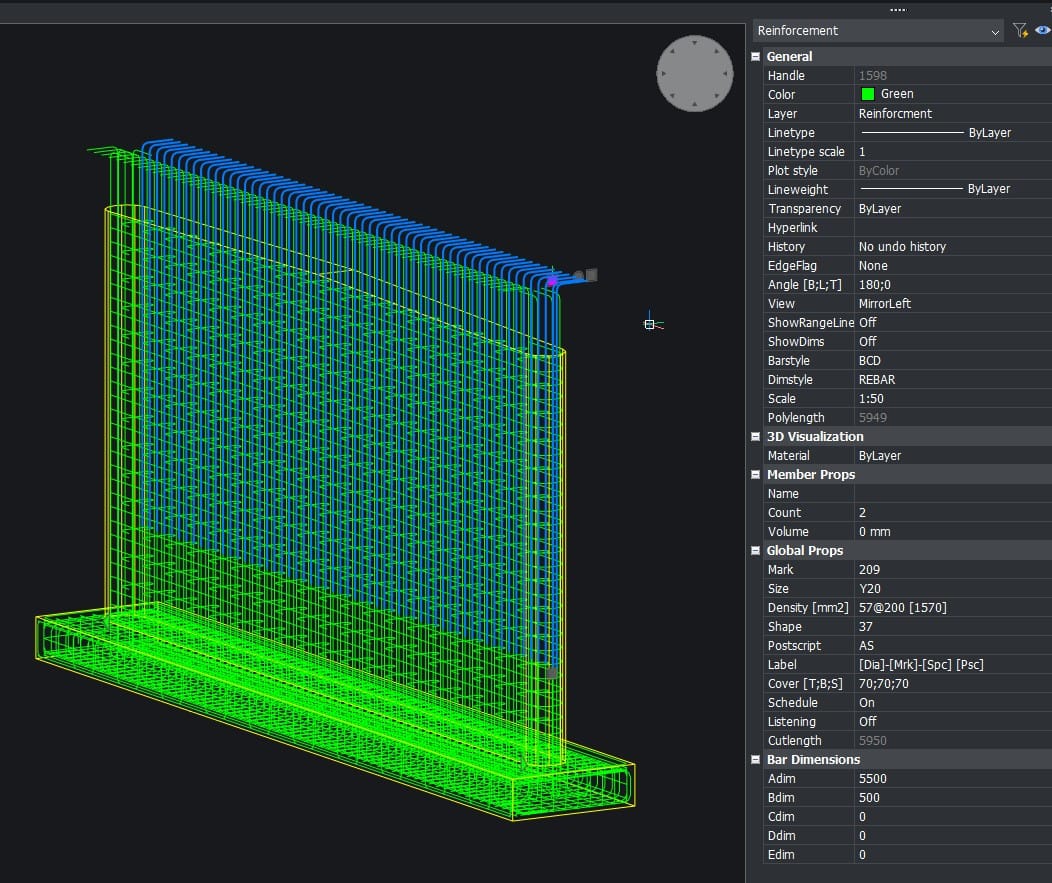
Step 2 (Optional): Set BarStyle to 3D Extrude
For a more realistic representation of reinforcement, you can set your BarStyle to 3D Extrude. This setting allows bars to be visualized as actual 3D objects, rather than just lines or wireframes—making your model more accurate and easier to interpret.
Step 3a: Add a Bar Using the Ribbon
You can now add a bar via the AddoBAR ribbon. When inserting the bar, Dynamic UCS will automatically manage UCS alignment, allowing you to place the bar correctly on any face or plane of your 3D solid model without manual UCS adjustments.
Alternatively, if needed, you can also manually set a custom UCS for more controlled placement.
Step 4a: Insert a Range
After inserting the bar, you can use the Range command to insert a range of bars. With Dynamic UCS enabled, the UCS will automatically adjust to the plane where the range line is being inserted, making placement seamless. Otherwise, you will need to manually set the UCS to align with the desired plane before inserting the range.
Step 3b: Add a Bar Using the Ribbon
You can now add a bar via the AddoBAR ribbon. When inserting the bar, you will need to manually set the UCS to align with the face or plane of your 3D solid model where the bar will be placed. This allows for precise control over the bar’s orientation and placement.
Alternatively, you can use Dynamic UCS if you prefer automatic alignment to simplify the process.
Step 4b: Insert a Range
After inserting the bar, you can use the Range command to insert a range of bars. You will need to manually set the UCS to align with the plane where the range line will be inserted, ensuring accurate placement.
Alternatively, if you enable Dynamic UCS, it will automatically adjust the UCS to the correct plane, making the process easier.
Step 5: Adding Labels
Labels can be added by tagging the reinforcement using the Tag Bar feature within the paper space. This method is highly recommended as it works much more seamlessly for reinforcement labeling and management.
Additionally, we recommend removing leaders and hiding range lines through the Properties palette to keep your model clean and clear.
Step 6: Switch to Paper Space
Once your reinforcement and labels are in place, go to Paper Space where you have your viewport set up. This is where you can review the placement, scale, and alignment of your model and tags for documentation or plotting purposes.
Step 7: Tag Bars in Paper Space
Adjust your viewport to the desired view, then use the Tag Bar function to tag your reinforcement bars.
The Tag Bar function works as follows:
- First, it prompts you to select a viewport.
- After selecting the viewport, it will open and unlock it so you can zoom and pan freely inside.
- While inside the viewport, select the bar you want to tag.
- After selecting the bar, the viewport will reset to its original state.
- You will then be presented with a list of tag options to choose from.
- Finally, pick the start point of your leader and place the tag in the desired location.
Note: We are still actively developing the Tag Bar tool. Future updates will enhance its capabilities to handle detailing directly from paper space much more efficiently, making your workflow smoother and more intuitive.