
Attribute Master Tutorial: Exporting DWG Attributes to Excel

Welcome to Our Guide on Using Attribute Master
In this blog post, we'll explore how to leverage the Attribute Master tool to streamline your CAD workflow. Whether you're managing a small project or dealing with thousands of DWG files, Attribute Master simplifies the extraction of block attributes and enhances your productivity.
We'll walk you through the step-by-step process of setting up the tool, exporting attributes to Excel, and integrating this data into your projects. Follow along to discover how this powerful tool can transform the way you handle CAD data. For a video guide, please use this link: Watch the Video Guide.
If you have any questions or need further assistance, feel free to email me.
Step 1
Make sure you follow this guide to set up your drawings with a block reference that includes attributes. Ensure that all of your drawings in the subfolders have this block on their layout pages, and verify that no drawings are currently open.
Step 2
Click on the Attribute Master tool in the AddoSOFT ribbon.

This popup will appear:
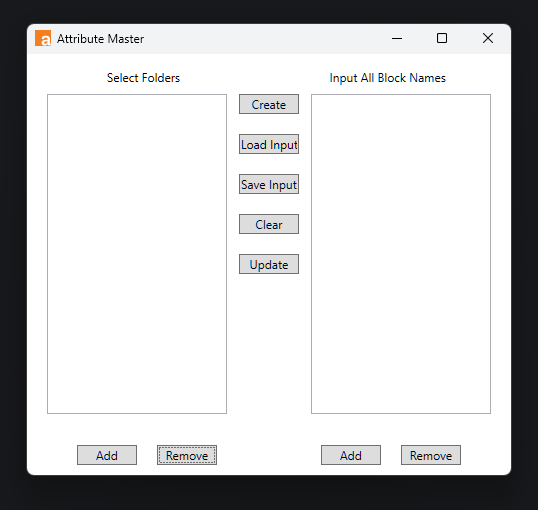
Here is a breakdown of each button:
- Bottom Left: The "Add" button allows you to add a folder to be searched for containing DWGs. Next to it, the "Remove" button will remove a folder from the list.
- Bottom Right: The "Add" button lets you add block names you are searching for, while the "Remove" button next to it will remove block names from the list.
- Center at the Top: The "Create" button pulls the attributes from the DWGs and sends them to Excel.
- Below That: The "Save" and "Load Input" buttons are used to save your folders or blocks (or both) for future use, making it easier to reload them later.
- Next: The "Clear" button will clear all input from the screen.
- Last: The "Update" button pulls data from Excel and updates your DWGs accordingly.
Step 3
Click the "Add" button to add folders. Let's add two folders to search through.
Click "Add Blocks" to include block names that exist in your DWG files. Make sure to enter the exact block names as they appear.
Step 4
Now, if you wish to save your input, click on the "Save Input" button.
Step 5
Click on "Create" and then select a location where you want to save the Drawing List file. After that, you can choose which files you want to export.
Step 6
After the export process is complete, Excel will open, and you will see all of the sheets that have been exported along with their attributes.
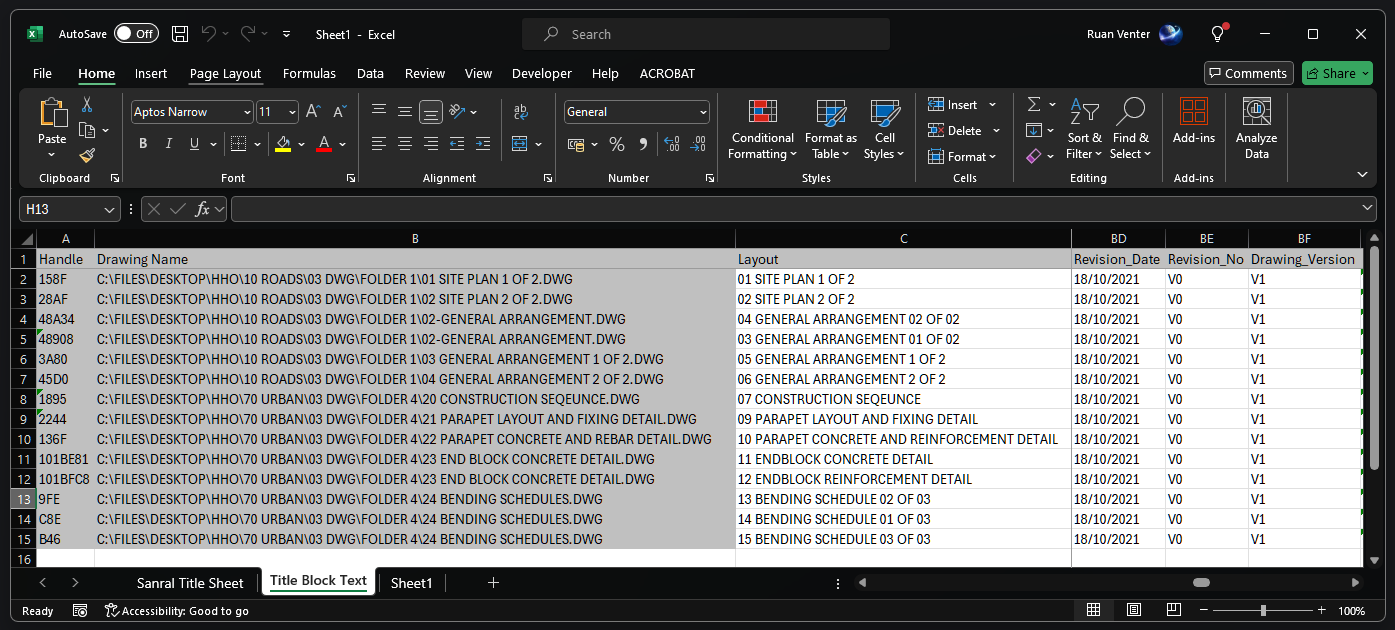
Here, you can also see that our block references match the Excel sheet.
"Title Block Text"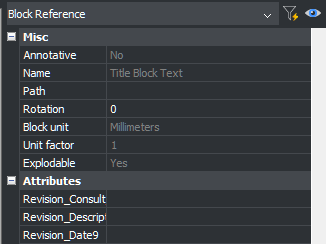
Step 7
Now you can make any changes in Excel, then hit the "Save" button. After that, close Excel and ensure that all open drawings are closed.
Step 8
Now, go back to CAD and in the Attribute Master tool, click "Update." Select the Drawing List you just saved and click "OK." A list will be pulled with all the drawings from the Excel file. Here, you can choose which files you want to update. After making your selections, click "OK."
After the update is complete, a Notepad file will open showing you the logs of the synced files.
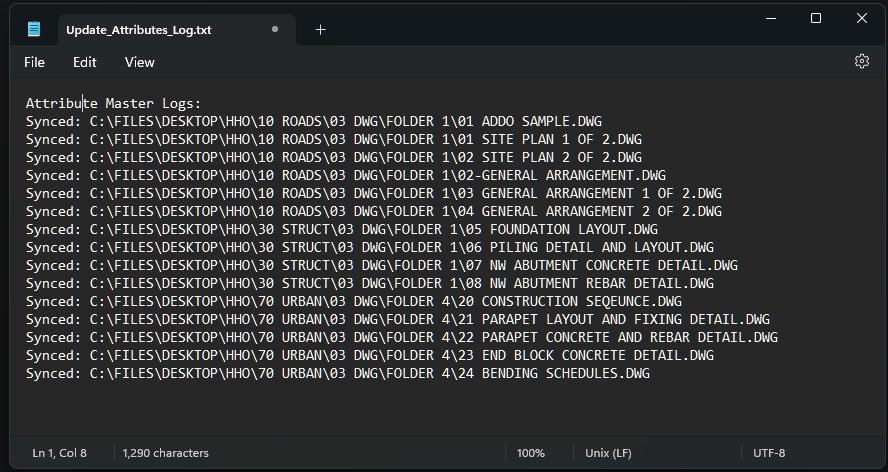
Review the log file to ensure that all changes have been successfully applied to the selected drawings. This log provides a quick summary of the updated files, helping you verify that the process was completed without errors.
Welcome to Our Guide on Using Attribute Master
In this blog post, we'll explore how to leverage the Attribute Master tool to streamline your CAD workflow. Whether you're managing a small project or dealing with thousands of DWG files, Attribute Master simplifies the extraction of block attributes and enhances your productivity.
We'll walk you through the step-by-step process of setting up the tool, exporting attributes to Excel, and integrating this data into your projects. Follow along to discover how this powerful tool can transform the way you handle CAD data. For a video guide, please use this link: Watch the Video Guide.