
How to Customize Bending Schedules in AddoBar for Reinforcement Detailing in CAD
Mastering AddoBar: Customizing Bending Schedules for Precision Reinforcement Detailing
AddoBar is designed to meet global standards in reinforcement detailing, offering support for country-specific shape codes. Customizing your bending schedules ensures compliance with local standards, enhancing detailing accuracy and project efficiency. This guide will demonstrate how to tailor the bending schedules in AddoBar to fit your project's specific requirements.
1. Accessing the Schedule
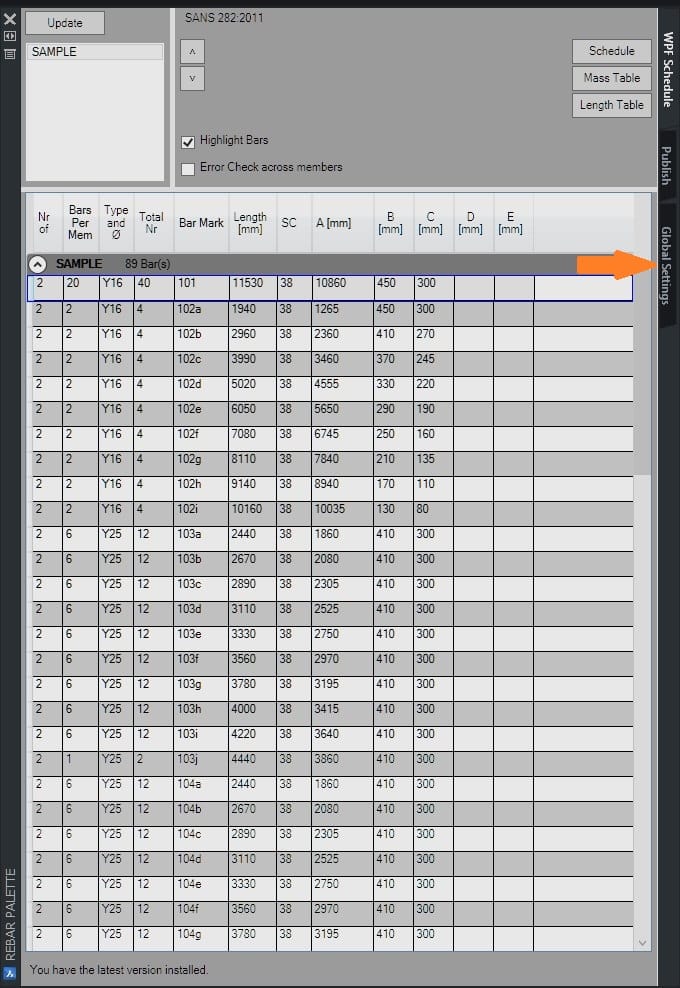
To begin customizing your bending schedules, open the AddoBar Ribbon by clicking on the 'Schedule' option located at the top left of your screen.

2. Navigating to the Global Settings Settings
Within the schedule interface, locate the 'Global Settings' section on the right side of the Rebar Palette. This is where you can access various customization options for your bending schedules.
3. Customization Options in AddoBar
-
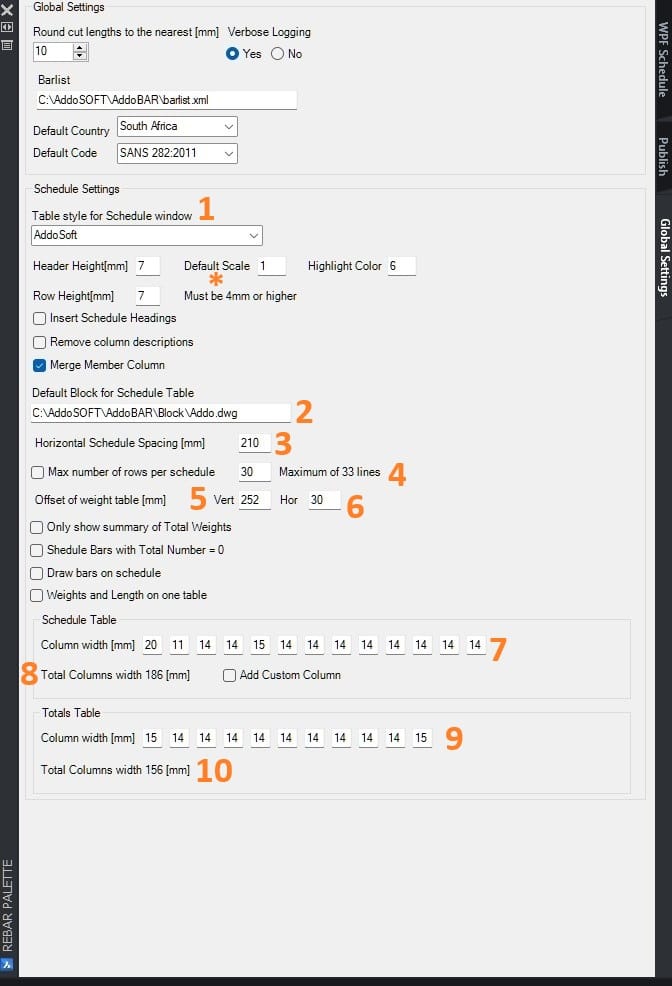
Choose Your CAD Table Style:
This option allows you to select your preferred CAD table style, which controls the text position, color, size, and all table-related settings except row heights and widths. Note: The scale is set to 1 for the next section on understanding offset and margin values.
-
Default Block for Schedule Table:
Create a custom block to add additional information, such as company name and project details, in the bending schedule. Ensure this block is at a 1:1 scale to match the true scale of the settings. The insertion point is always at (0,0), so design the block to work down and to the left from the insertion point. You can create this block from a DWG file that we can provide, eliminating the need to create a block from scratch. You just need a template for the schedule. See "C:\AddoSOFT\AddoBAR\Block\Addo.dwg" for sample
-
Horizontal Offset for Tables:
This setting determines the horizontal offset for tables. For example, a value of 210 means the second table in the schedule will be offset 210 units to the right.
-
Number of Rows in Schedule:
Control the number of rows to add in the schedule. When selecting the maximum option, the software will automatically calculate how many rows can fit between your weight table and headers.
-
Vertical Offset of Weight Tables:
This setting defines the starting point in the Y direction where the weight table will be plotted.
-
Horizontal Offset of Weight Table:
This setting defines the starting point in the X direction where the weight table will begin.
-
Column Width:
Set the margins for the columns as displayed in the schedule.
-
Total Width of Schedule:
This setting defines the total width of your schedule by combining all column margins set in point 7.
-
Column Margins for Weight Tables:
Set the margins for the columns specifically within the weight tables.
-
Total Width of Weight Table:
This setting defines the total width of your weight table by combining all column margins set in point 9.
4. Saving and Applying Your Settings
After making the necessary adjustments, the settings will be automatically saved. You can now return to the main interface, confident that your bending schedules are customized to meet your project's demands.
5. Understanding Offset and Margin Values
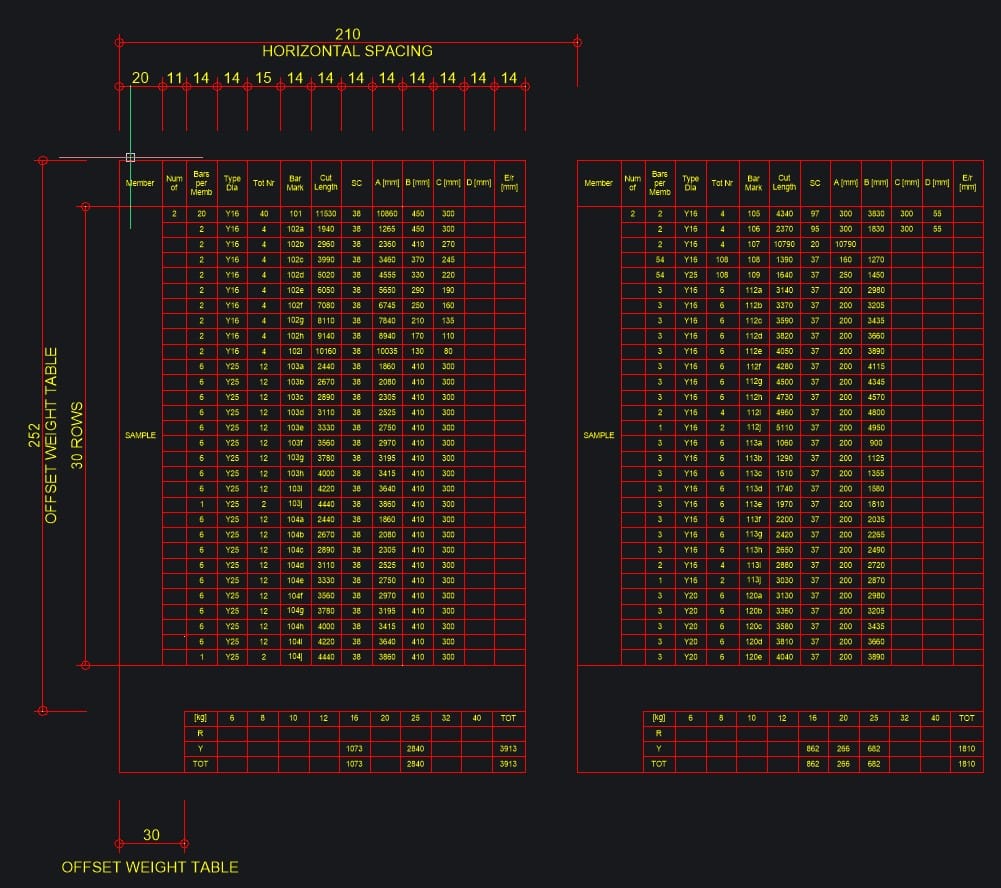
The image below illustrates how offset and margin values are determined. The sample shown uses a 1:1 scale to display true values. To customize these values according to your project scale, adjust them accordingly. For instance, if your project scale is 1:50, divide your value by 50 to obtain the accurate value to be used in the settings.
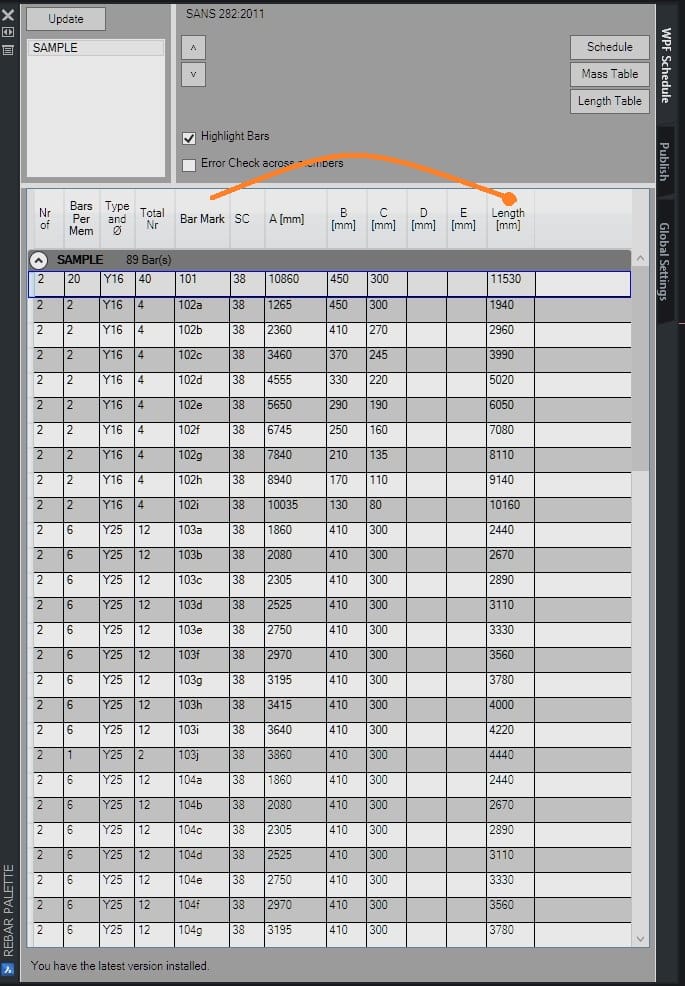
6. Repositioning Table Headers
To change the position of a table header, click on the header and drag it to your preferred location. Note that after moving a header, you will need to adjust the column widths in the Global Settings Schedule Table to ensure proper alignment and formatting.
Why Customize Bending Schedules in AddoBar?
Customizing bending schedules in AddoBar to align with your local standards enhances its functionality, making it better suited to meet regional requirements. For CAD users involved in reinforcement detailing, the benefits of customizing your bending schedules include:
- Alignment with local construction practices, ensuring adherence to established methods and techniques.
- Enhanced accuracy in reinforcement detailing, leading to more precise and reliable project outcomes.
- Compliance with regional engineering standards, ensuring that all designs meet local regulations and codes.
Conclusion: Optimize Your Projects with Customized Bending Schedules in AddoBar
For CAD users focused on reinforcement detailing, customizing bending schedules in AddoBar is a straightforward process that significantly improves the precision and compliance of your designs. By following the steps outlined in this guide, you can ensure your projects are optimized for success, meeting all local standards and requirements with ease.