
Title Sheet Creation and Maintenance: Using Excel for Efficient Attribute Management

Step 1: Open a Template Drawing
Accessing the Template Drawing
To start the process, open your CAD software and locate the designated template drawing file. This template should already contain a standardized title sheet layout that includes essential, static information.
Step 2: Define Text Attributes

Defining Text Attributes
Once your template drawing is open, proceed to define the text attributes required for your project. Text attributes include information like project details, structure types, and any other pertinent data that needs to be standardized across drawings.
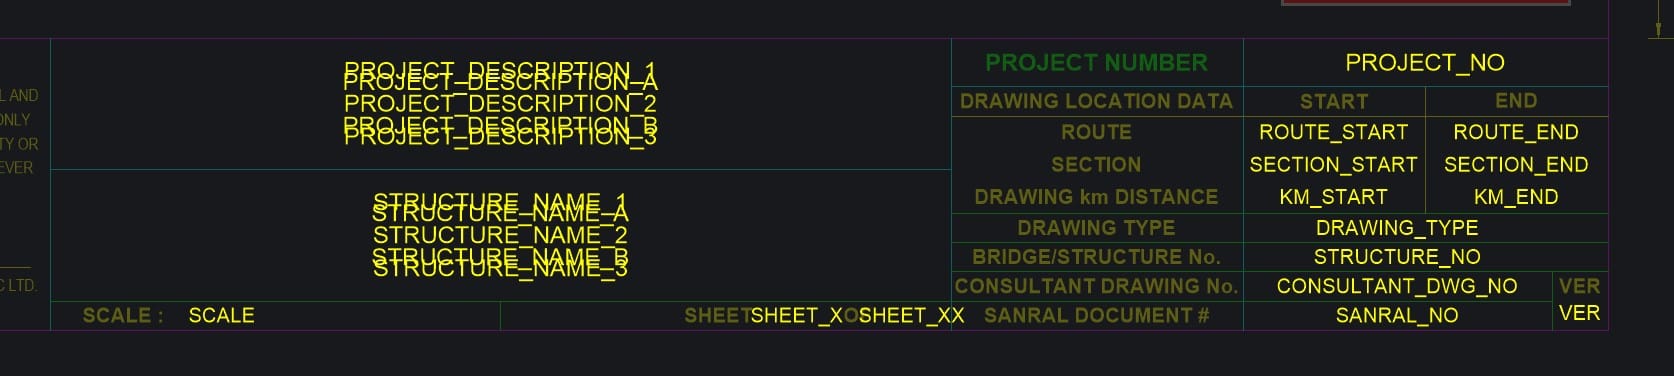
In the example above, we have divided our project description and structure name into two sets: A and B, and also into three sets: 1, 2, and 3. This approach is useful when dealing with extensive project details that need to be organized across multiple rows.
When defining text attributes, you have the flexibility to create multiple sets. For instance, you might split your project description into two attributes labeled as A and B, or into three attributes labeled as 1, 2, and 3. This allows for accommodating longer project descriptions that require either two or three rows of text.

You can assign multiple text attributes with identical names. This approach consolidates them into a single Excel column, linking that column to all instances of attributes sharing the same name. In the image above, you can see that we reused 'Sheet_X' positioned again at the top of the title sheet.
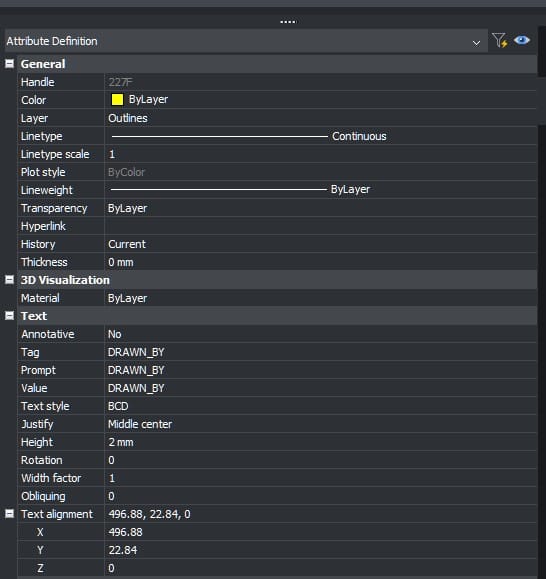
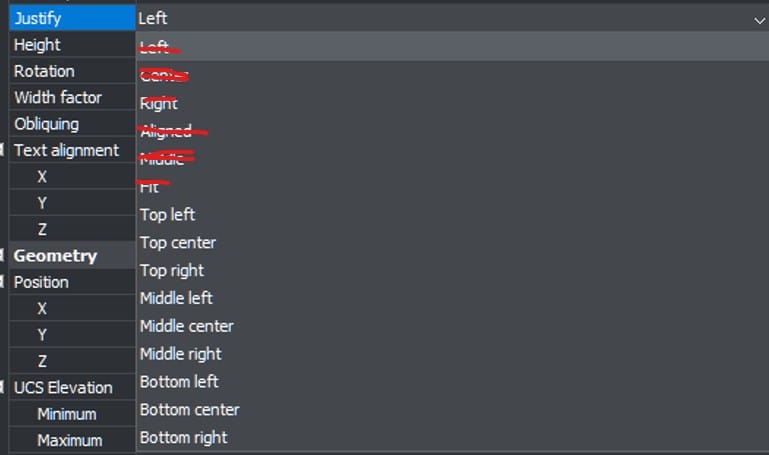
The image illustrates an attribute definition. To streamline bulk creation, we employ a command called AB_TEXTTOATTB. This command converts any text item (excluding MText) with the correct justification (refer to the image below) into an attribute definition.
Step 3: Create Attribute Blocks
Creating Attribute Blocks
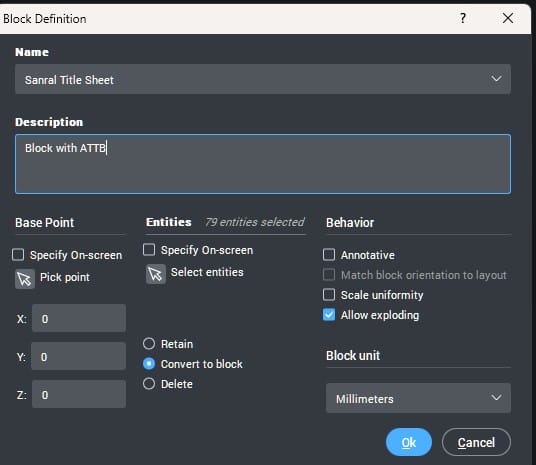
After defining your text attributes, proceed to create attribute blocks by selecting all defined attributes and creating a new block. Attribute blocks enable you to consolidate specific information within your CAD drawings, ensuring uniformity and efficiency when updating project details across multiple files.
It's crucial to note that after creating the attribute block, exporting it to Excel allows for easy editing of title sheets. Remember, the block's name in CAD is directly linked to the Excel sheet name, so choose a name that reflects its content clearly.
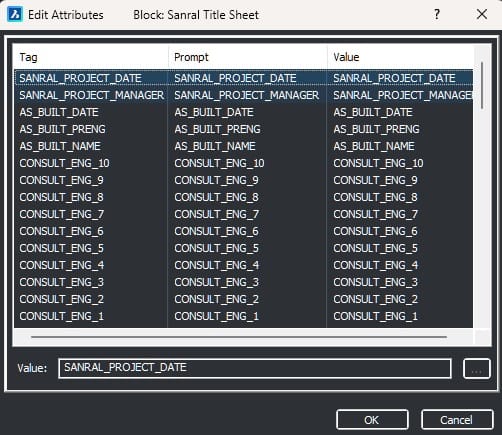
A second pop-up will appear. Before proceeding, verify that all attributes are correctly listed and click "OK" to finalize the creation. We will adjust there
Step 4: Open Block Attribute Manager
Accessing Block Attribute Manager
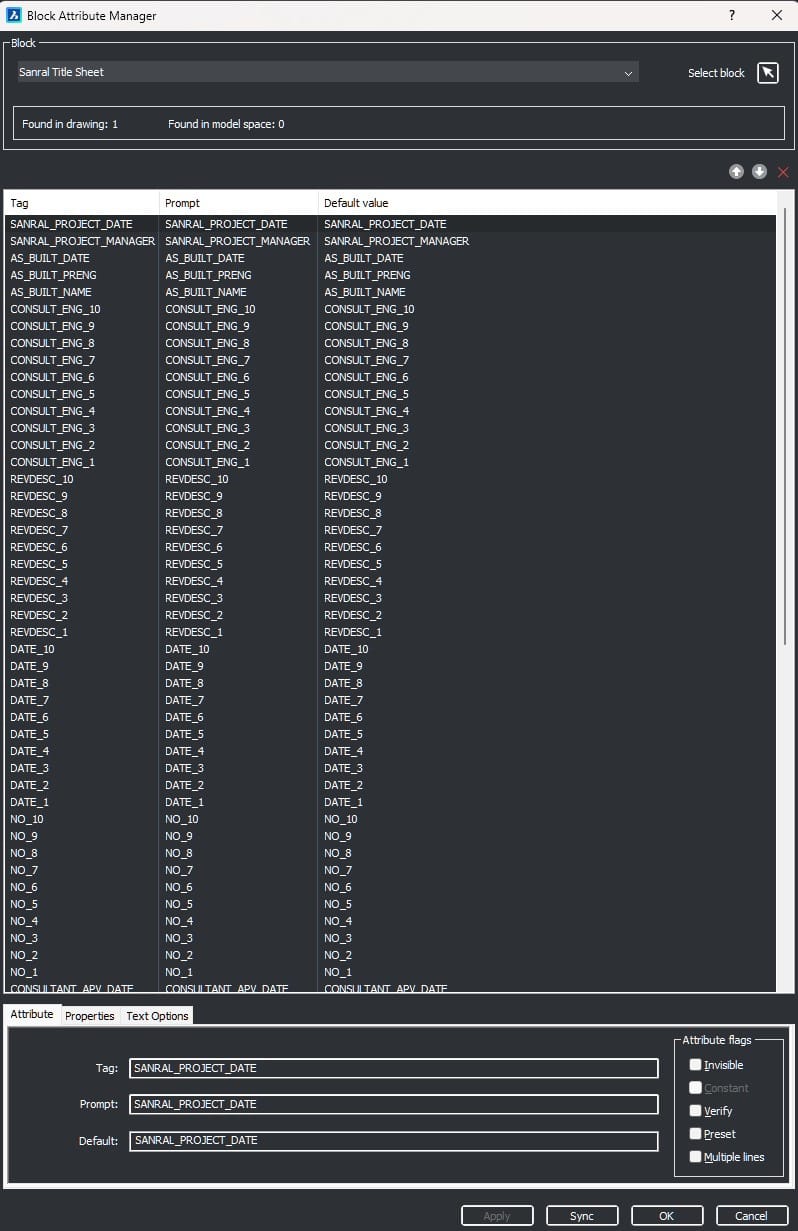
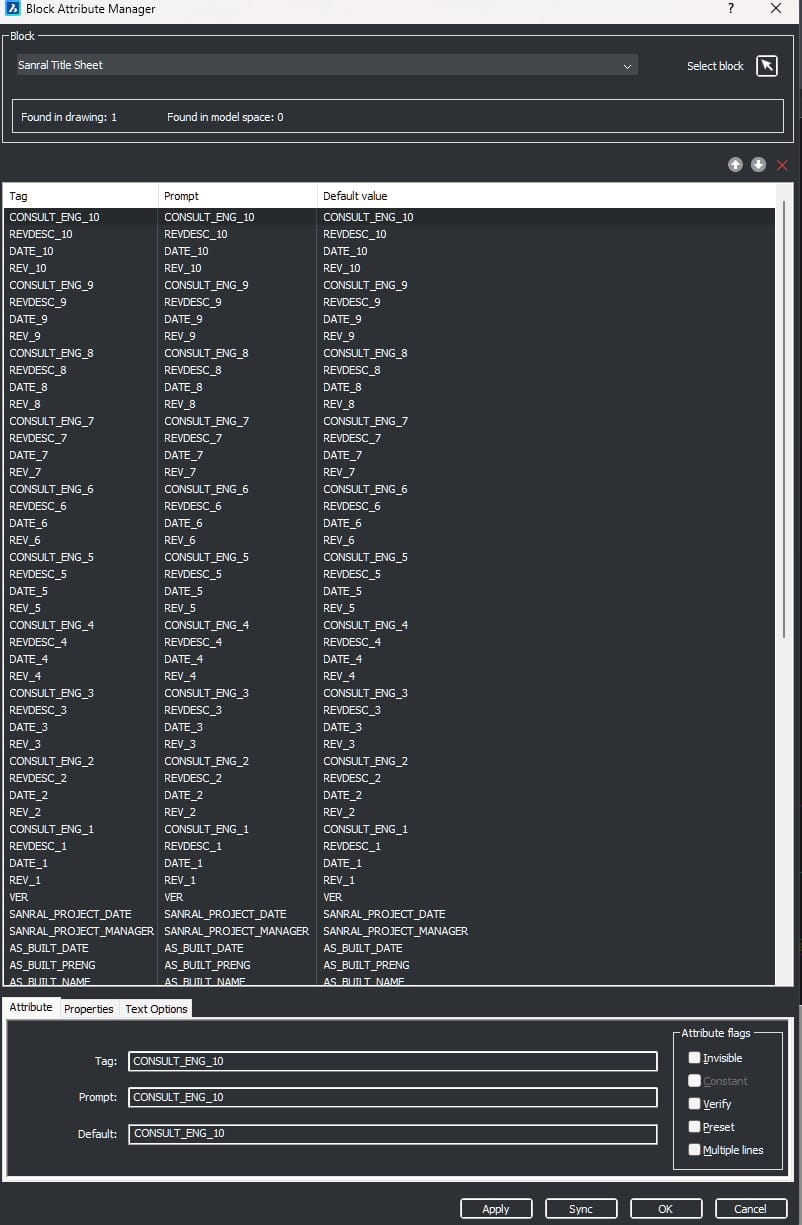
Once you've created your attribute blocks, navigate to the Block Attribute Manager. This tool enables you to control and customize the presentation of attribute data in your CAD drawings, ensuring clarity and organizational consistency.
Use the arrows to arrange your attributes as needed. Note that the topmost item in the list corresponds to the last column in Excel.
Step 5: Export Attribute Blocks to Excel

Exporting Attribute Blocks to Excel
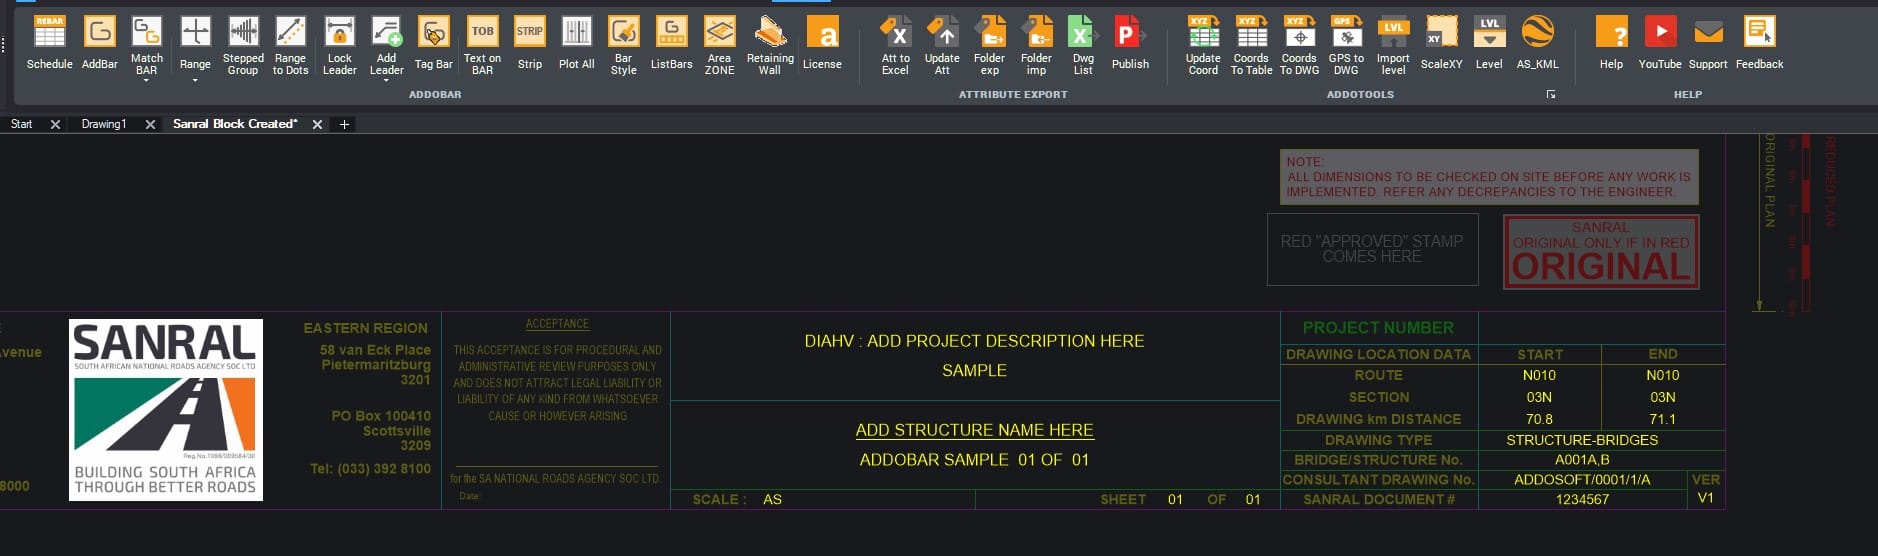
After organizing your attribute data in the Block Attribute Manager, proceed to export the attribute blocks to Excel using the "ATT to Excel" command found in the ribbon under Attribute Export.
This process allows you to generate a spreadsheet that mirrors the layout and information of your CAD drawings, facilitating easy editing and data management. Note that this command exports attributes from a single drawing. Since we are creating a template, we are testing the block to ensure all information is correct.
To export, execute the "ATT to Excel" command and select the attribute block you wish to export.
Later, we will explore the Folder Export feature, which allows exporting the attribute block to Excel for all drawings that contain this block. This feature streamlines the process of updating and managing attribute data across multiple CAD drawings.
Ensure all attribute blocks are correctly aligned and organized in the Block Attribute Manager before initiating the export.

When you open Excel after exporting, the first row displays the attribute definitions you exported. From the second row downwards, each subsequent row represents a block instance found in different layouts across various drawings.
You can modify the attribute values starting from column D onwards, allowing you to update and customize the properties of each block instance as needed.
Additionally, the export process also generates a drawing list in Excel format (XLS), listing the drawings where these attribute blocks are located for comprehensive management.

Getting ready for the Import Function
Now, you can add information to the Excel file to test the import function. Enter the relevant data under the appropriate headers in row 2 and onward. After adding the information, remember to save the file.
It's important to note that when entering dates in Excel, ensure they are formatted as text. Inputting dates as date values may cause display issues.
You can also utilize some CAD functions within the Excel file. For example, to underline text, add "%%U" in front of any text, and it will be underlined when imported back into CAD.
Step 6: Importing Updated Attribute Data
Importing Updated Attribute Data
After updating and saving the Excel file, you can import these changes back into your CAD drawings. This process updates the attribute values in your drawings based on the modifications made in Excel.
To import the data, follow these steps:
- Return to the template drawing and navigate to the ribbon where the "ATT to Excel" command is located.
- Select the "Update ATT" command to initiate the import process.
- The software will automatically pull the updated values from the Excel file and apply them to the corresponding attribute blocks in your CAD drawings.
To update a single drawing, open the specific drawing you want to update and then select the "Update ATT" command to apply the changes.
Step 7: Finalizing and Implementing the Attribute Block
Congratulations! You have successfully created and tested your attribute block. Now, you can implement this attribute block into your work drawings to streamline the management of title sheets across your project.
To do this, follow these steps:
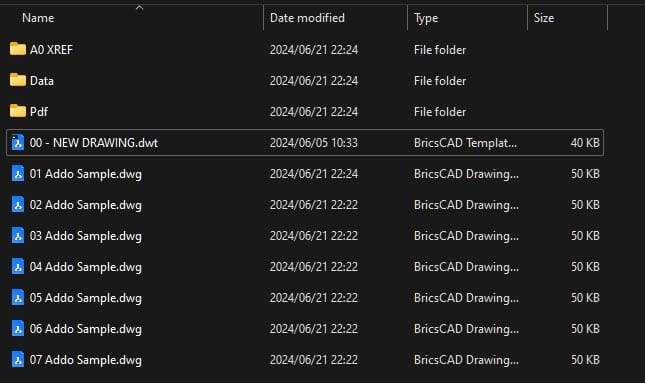
- Navigate to the project folder containing your work drawings.
- Open each drawing and copy the attribute block onto each layout.
- This will enable you to export and manage the title sheets for the entire project efficiently.
A helpful tip for the future: add the attribute block to your template drawing. By doing so, the attribute block will be automatically included in all new drawings you create, ensuring consistency and saving time.
Step 8: Exporting Attributes for a Folder
Exporting Attributes for a Folder
After adding the attribute block to all your work drawings, you can export the attribute data for the entire project folder. This enables efficient management and updating of title sheets across multiple drawings.
To export attributes for a folder, follow these steps:
- Open any drawing in the project using your CAD software.
- Navigate to the ribbon where the "ATT to Excel" command is located.
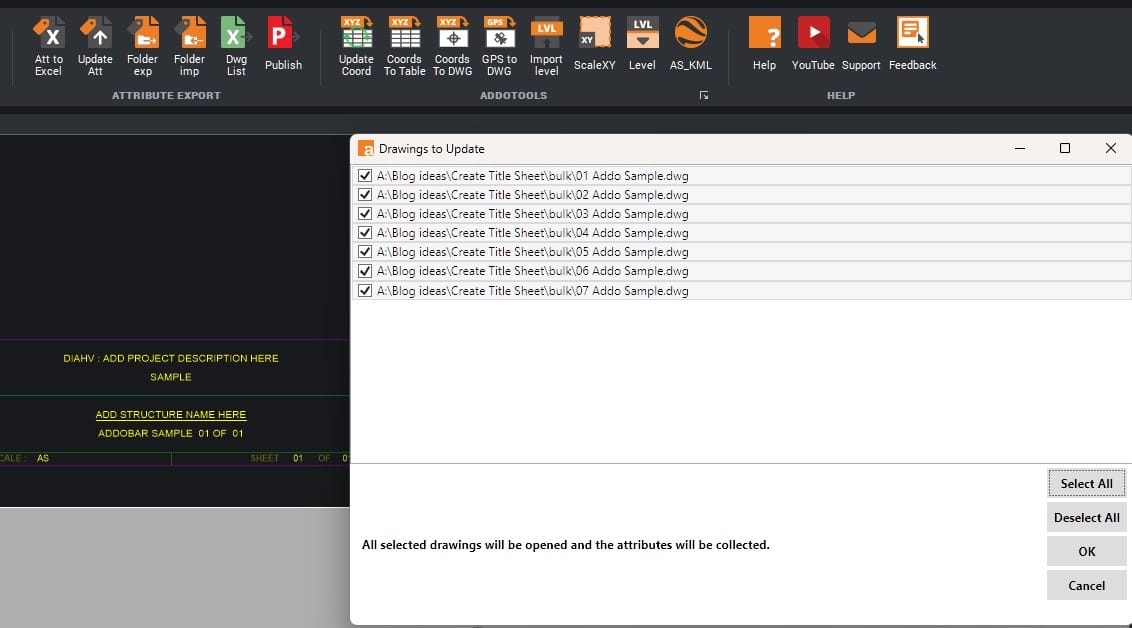
- Select the "Folder Exp" command to initiate the export process.
- Select the attribute block you created and press enter.
- A list of all drawings in the project folder will appear. Choose the drawings you want to export.Press OK
- The software will generate an Excel file that contains the attribute data for all the selected drawings, organized in a single, manageable spreadsheet.You can find the drawing list in the Project folder again
This process provides a comprehensive view of the attribute data across all your drawings, making it easier to update and maintain consistency in your project documentation.

Updating Attributes in Excel
Now that you have exported the attribute data to Excel, you can update all the attributes for your sheets directly within the spreadsheet. This allows for easy and efficient bulk editing of your title sheet information.
Follow these steps to update the attributes:
- In the Excel file generated by the export process.
- Locate the relevant columns and rows for the attributes you want to update.
- Make the necessary changes to the attribute values.
- Once you have completed your updates, save the Excel file.
By updating the attribute data in Excel, you can ensure that all your CAD drawings reflect the latest information with minimal effort.
Step 9: Updating a Project Folder
Updating a Project Folder
To update your entire project folder with changes made in Excel, follow these steps:
- Open a new drawing in your CAD software.
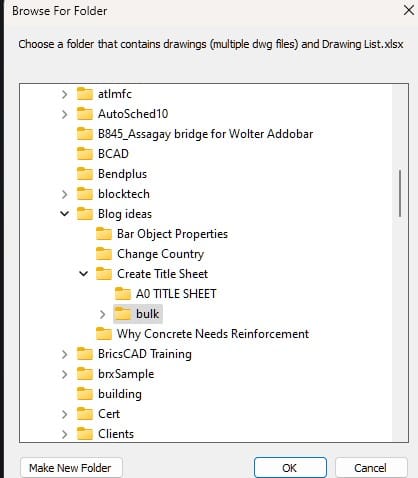
- In the ribbon, select the "Folder Imp" command.
- Browse to the directory containing your project files.
- Click OK to begin the import process.
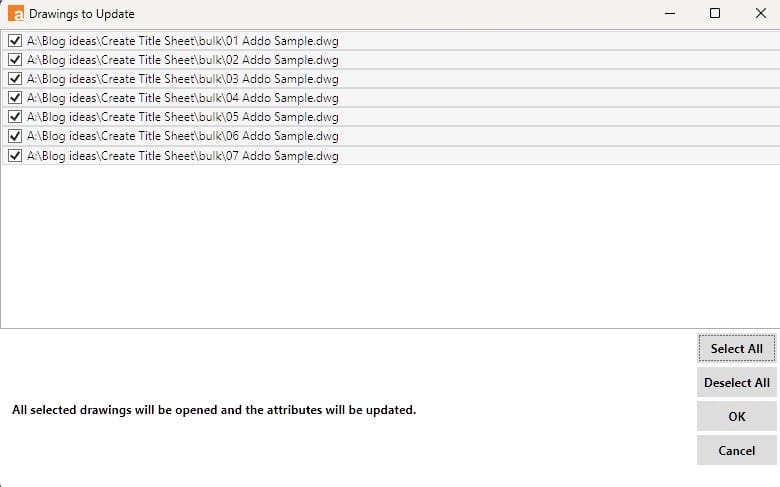
The software will prompt you with a list where you can select the drawings you want to update. Click OK to apply the changes to all selected drawings.
Conclusion: Using Attribute Blocks and Excel for CAD Users
Congratulations on mastering the creation and export of attribute data using block references and Excel in your CAD projects. This powerful tool allows you to efficiently manage and update title sheets across multiple drawings.
If you have any questions or need further assistance, feel free to contact me at ruan@addosoft.co. I'm here to help!
Whether you're an architect, engineer, or designer, optimizing your workflow with attribute blocks and Excel can streamline documentation tasks in CAD projects. Stay organized and save time by incorporating these techniques into your daily workflow.